

Installing an AC rolling door motor can seem like a daunting task, but with the right guidance and a bit of know - how, it can be accomplished successfully. As a supplier of AC rolling door motors, I've seen firsthand the benefits of these motors in various settings, from commercial establishments to residential garages. In this blog, I'll walk you through the step - by - step process of installing an AC rolling door motor.
Step 1: Gather the Necessary Tools and Materials
Before you start the installation, make sure you have all the tools and materials at hand. You'll need a drill, screwdrivers (both flat - head and Phillips), a level, a measuring tape, wrenches, electrical wire strippers, and safety equipment such as gloves and safety glasses. Of course, you'll also need the AC rolling door motor itself. Our company offers a wide range of AC rolling door motors, including the Rolling Shutter Motor For 600Kg, Commercial Roll Up Door Motor, and Single Phase Roller Shutter Motor. Choose the motor that best suits your door's weight, size, and usage requirements.
Step 2: Prepare the Door and Installation Area
First, ensure that the rolling door is in good condition and can move freely. Clean the tracks and remove any debris or obstructions. Measure the dimensions of the door and the installation area to ensure that the motor will fit properly. Mark the mounting points on the wall or ceiling according to the motor's installation instructions. Use a level to make sure the marks are straight and level.
Step 3: Mount the Motor
Once you've marked the mounting points, use the drill to create holes for the mounting brackets. Insert the wall plugs into the holes and then attach the mounting brackets using the provided screws. Place the motor on the mounting brackets and secure it tightly with the appropriate bolts and nuts. Make sure the motor is firmly attached and does not wobble.
Step 4: Connect the Drive Chain or Belt
Most AC rolling door motors are connected to the door using a drive chain or belt. Follow the manufacturer's instructions to attach the chain or belt to the motor's drive sprocket and the door's drive mechanism. Adjust the tension of the chain or belt to ensure smooth operation. A loose chain or belt can cause the motor to work harder and may lead to premature wear and tear.
Step 5: Electrical Connections
This is a crucial step, and it's important to follow all electrical safety procedures. Before making any electrical connections, turn off the power supply to the area where you'll be working. Strip the ends of the electrical wires according to the motor's wiring diagram. Connect the wires to the motor's terminal block, making sure to match the colors and labels correctly. Use wire nuts or terminal connectors to secure the connections.
Once the motor is wired, connect it to a suitable power source. It's recommended to use a dedicated circuit with the appropriate voltage and amperage rating. Install a safety switch or circuit breaker near the motor for easy shut - off in case of an emergency.
Step 6: Install the Control Unit
The control unit allows you to operate the rolling door remotely or manually. Mount the control unit in a convenient location, such as near the entrance or inside the building. Connect the control unit to the motor using the provided cables. Program the control unit according to the manufacturer's instructions. You can set up features such as open and close limits, safety sensors, and remote control functionality.
Step 7: Test the Motor
After completing all the installation steps, it's time to test the motor. Turn on the power supply and use the control unit to operate the door. Observe the door's movement carefully. Make sure it opens and closes smoothly without any jerks or noises. Check the safety sensors to ensure they are working properly. If the door stops when an object is detected in its path, the sensors are functioning correctly.
Step 8: Make Adjustments
If you notice any issues during the test, such as the door not opening or closing fully, or the motor making unusual noises, make the necessary adjustments. You may need to adjust the limit switches, the tension of the chain or belt, or the alignment of the motor. Refer to the manufacturer's troubleshooting guide for specific instructions.
Step 9: Final Checks
Once you're satisfied with the motor's performance, conduct a final inspection of the installation. Check all the connections, bolts, and nuts to ensure they are tight. Make sure there are no loose wires or exposed electrical parts. Clean up the installation area and dispose of any waste materials properly.
Conclusion
Installing an AC rolling door motor can be a rewarding project that enhances the functionality and security of your rolling door. By following these steps and using high - quality products, you can ensure a successful installation. If you have any questions or need further assistance during the installation process, don't hesitate to contact us. We're here to help you every step of the way.
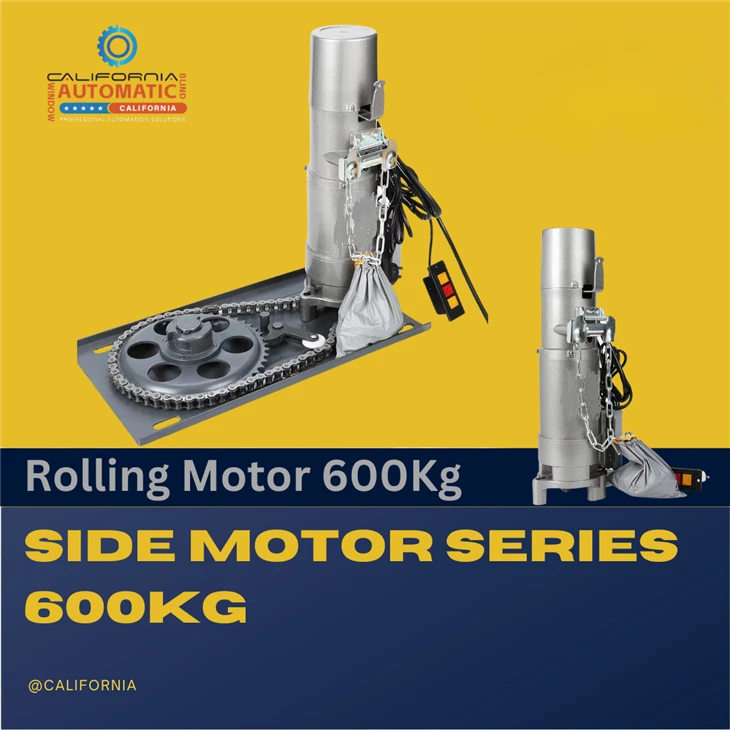

As a leading supplier of AC rolling door motors, we are committed to providing our customers with top - quality products and excellent customer service. Our motors are designed to be reliable, efficient, and easy to install. Whether you're a DIY enthusiast or a professional installer, we have the right motor for your needs.
If you're interested in purchasing an AC rolling door motor or have any inquiries about our products, we encourage you to reach out to us for a purchase negotiation. Our team of experts will be happy to assist you in selecting the right motor and answering any questions you may have.
References
- Manufacturer's installation manuals for AC rolling door motors
- Electrical safety standards and guidelines